This whitewash art station project was a fun one for me, and I was really happy with how it turned out.
(This post is written by Melissa)
We recently listened to The Magnolia Story by Chip and Joanna Gaines on one of our recent road trips. (We love audio books!) It is a fantastic book that I would recommend to anyone. Rob has listened to it 3 times since then because it’s just so good.
Try Audible and Get Two Free Audiobooks
One thing that Joanna wrote/said was in one of their houses that was like a dream house for her, she was always stressed about keeping the kids’ stuff contained. She later realized that she never created a space just for them. A space where they could just be kids.
This was something that both Rob and I thought about for our own space. We didn’t really have a space for them besides their bedrooms — which is fine — but a dedicated space for creativity is always a plus.
Rob wanted to turn our office into a playroom, but I told him that since we work from home, a home office is pretty non-negotiable. Ha.
I had wanted to make them their own art station for a long time though. The girls love to color, draw and paint, and I wanted a space for them where they could do that.
I have started drifting to a lot of white furniture lately, because I love brightening everything up. We don’t have a ton of natural light in our house, and I think the white furniture helps add a little brightness to each room. We have previously had all brown furniture, but I have slowly started to change everything over – piece by piece.
At the moment we don’t have a huge budget for new furniture, so I wanted to make this area as cute, but budget-friendly as possible! And I feel that the goal was accomplished. The desk itself cost nothing but time to create, and the whole art station itself cost only $9!
I was determined to find the pieces I needed for the desk without buying them. With the amount of stuff Rob has lying around, I knew he had to have something I could use! 😉
It turned out that my father-in-law had a pile of wood leftover from a project at their house. He told me I could have a few pieces. They had been sitting outside in the weather for a bit, but they looked like they would work to clean up and try to whitewash!
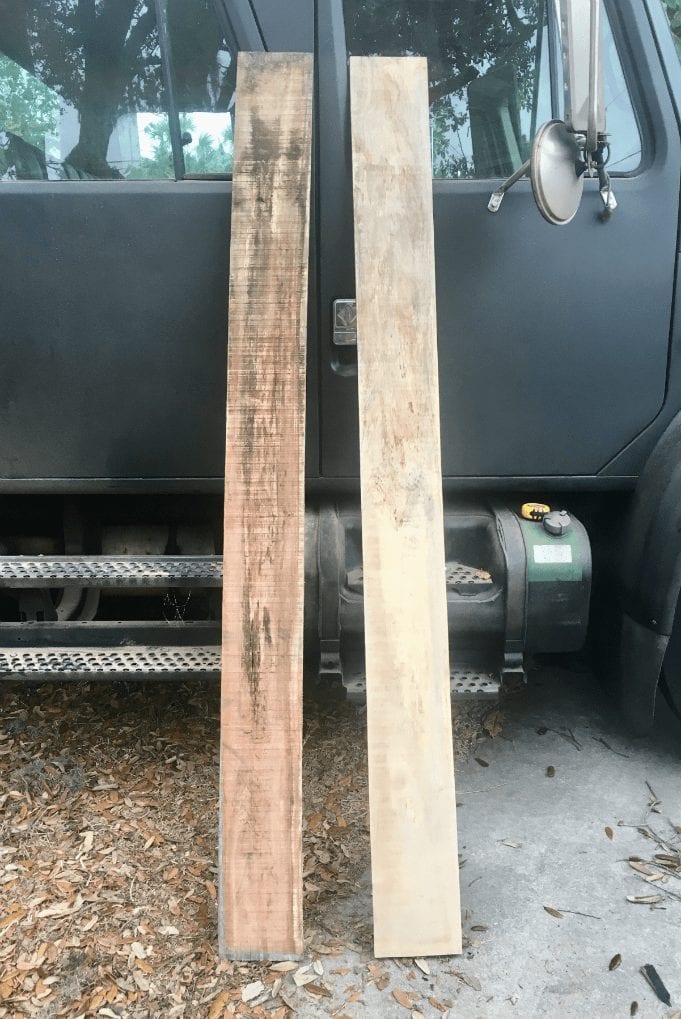
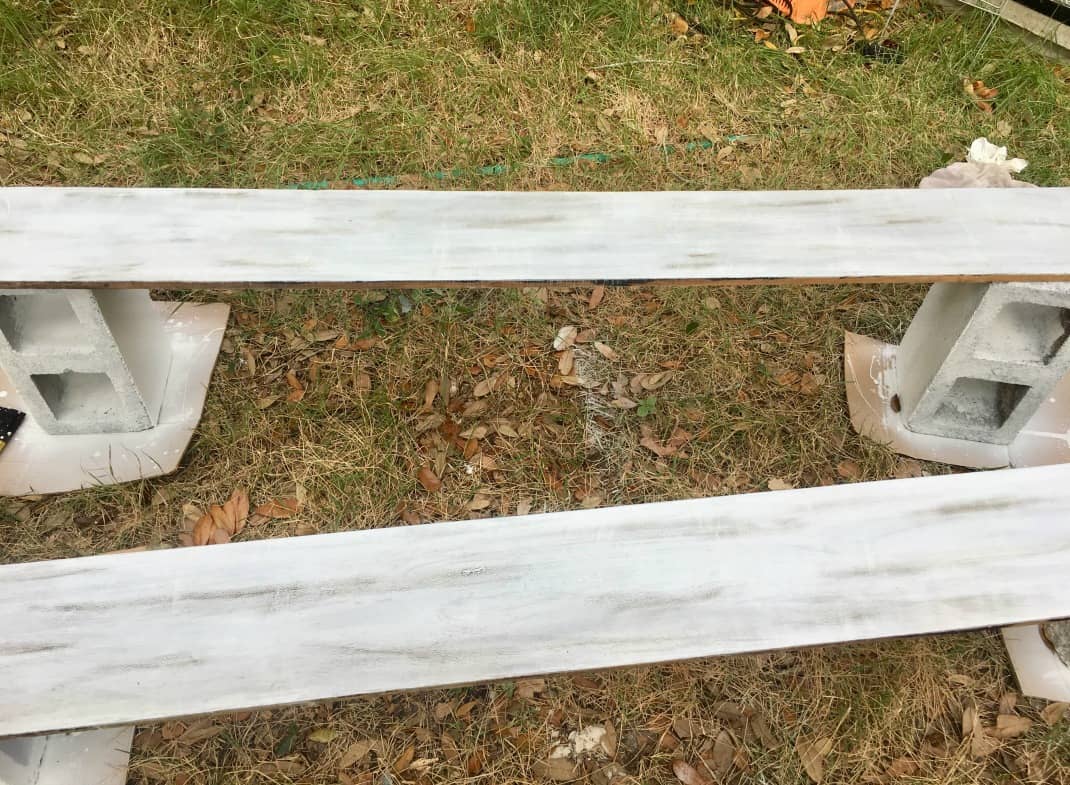
As you can see, the wood needed a little TLC, so I gave it a good sanding using a hand sander. (The one on the right is sanded).
This was my first attempt to whitewash anything, but I was super happy with how it turned out. I checked out Pinterest before I started and one of my favorite finds to help me get started was from Angela Marie Made. Her tutorial helped me get started with a plan and then I ran with it.
Here are the supplies I used to whitewash the wood:
– Rags
– Paint Brushes (one for stain and one for paint)
These were all supplies I had around the house, you could use other color wood stains as well.
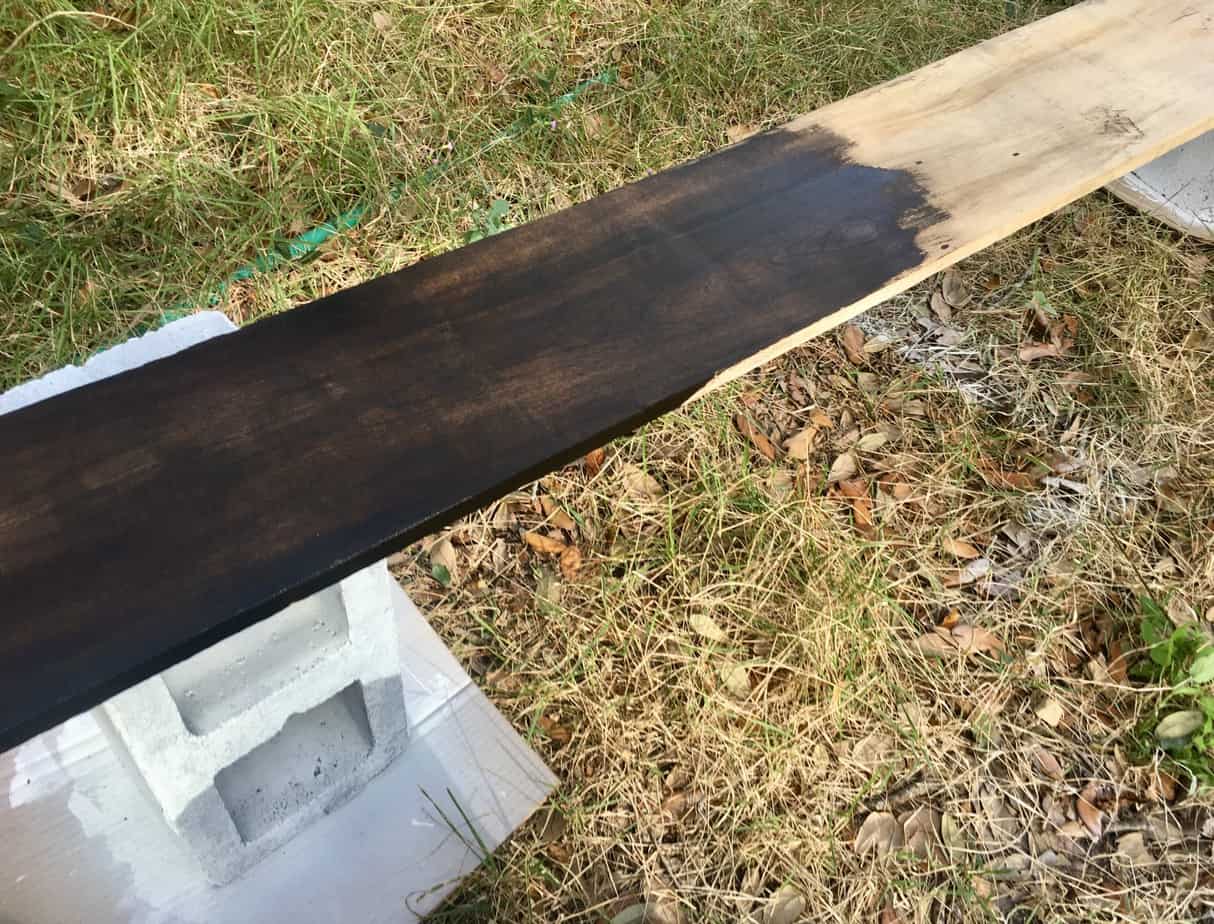
After sanding the wood the next step is to stain it. When applying the stain, wipe off the access and let it soak into the wood. I applied 2 coats of the Jacobean Minwax stain for this project.
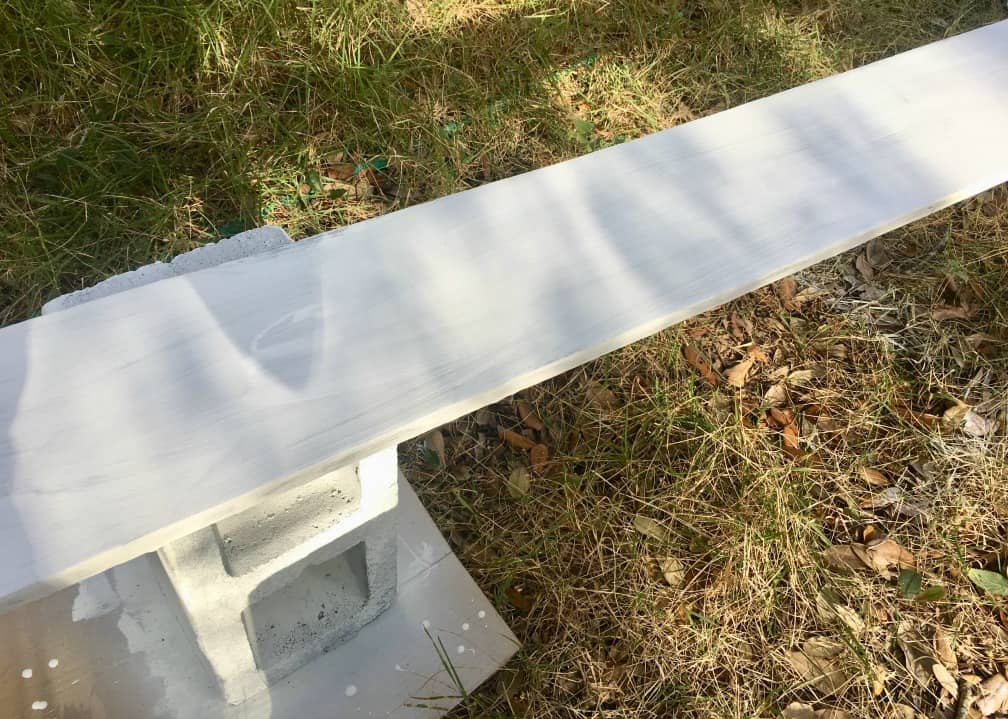
Once the stain soaked in, the next step was to apply the white paint. I used a basic white paint that I had lying around the house. I cut it with water (1 part paint to 1 part water), to make it thinner so I could get the whitewashed look.
Once the whole piece of wood was covered, I let it set for about a few seconds and then took a rag and started wiping some of it away. This gave it the weathered whitewash look. This process of painting and wiping it away was repeated 3 times to get the desired whiter color.
Wiping the paint away was probably my favorite part. I almost felt like an artist while trying to whitewash this wood. 🙂 I had the freedom to do as little or as much as I wanted.
If the paint dries before you wipe it away, or you decide you want a little more weathered look after it dries, you can always use a fine sandpaper to get a similar weathered effect.
Once everything was dry, I sealed the wood by spraying a clear sealer over it. I knew the kids will be drawing and coloring on it so I wanted to be sure it was sealed for easier clean up.
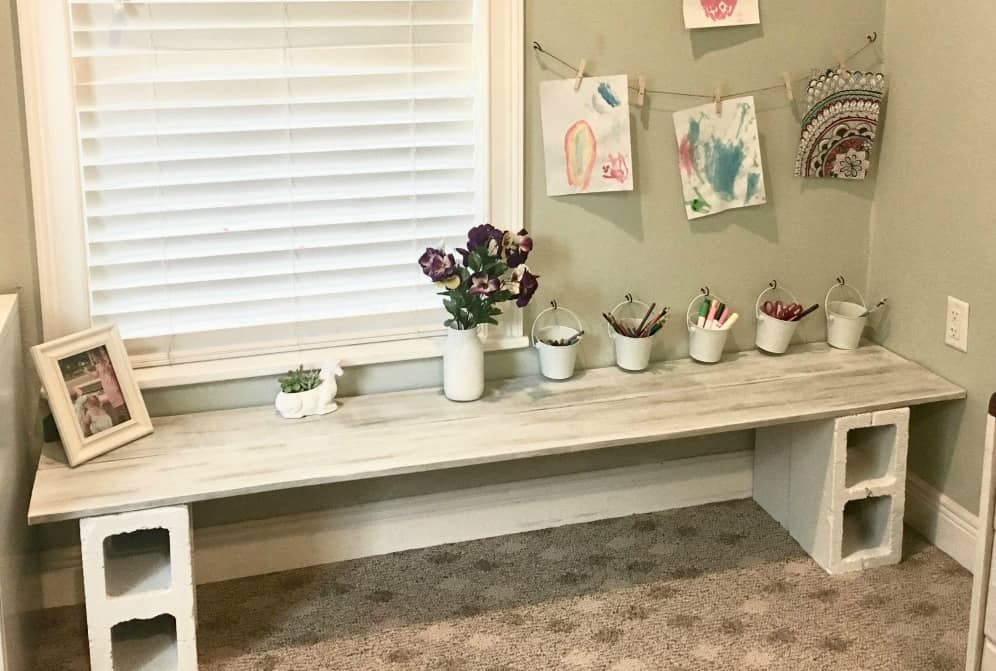
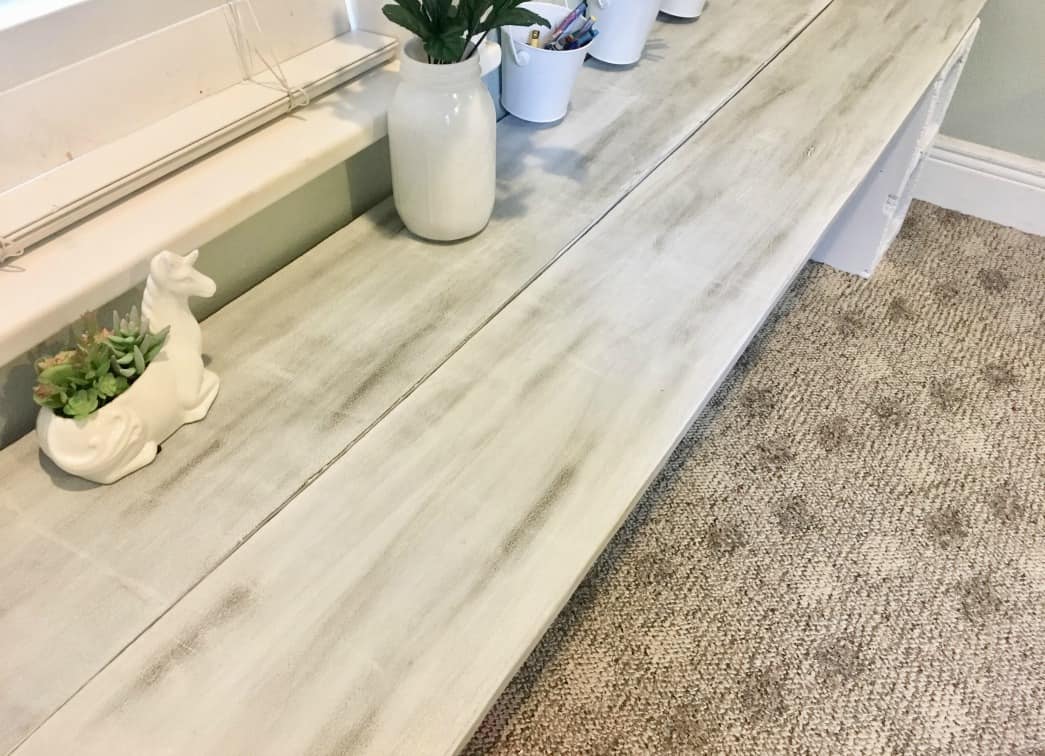
This is what the final wood looked like up close.
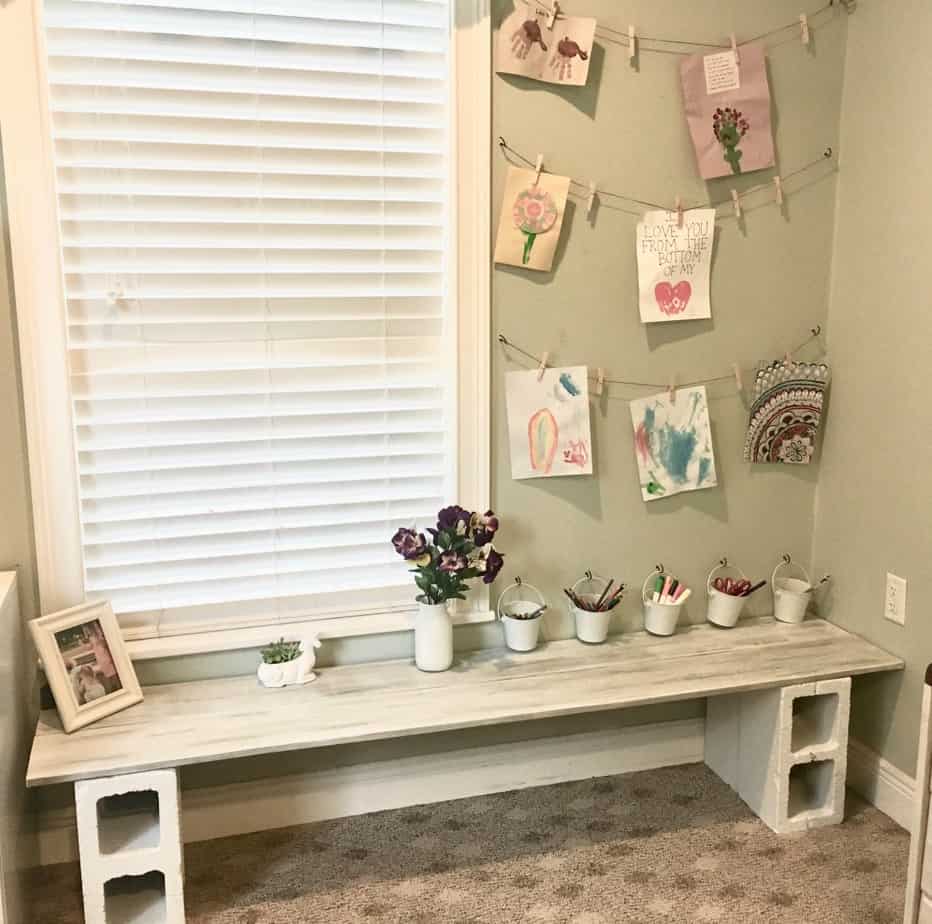
To make it a desk, I wanted to put the wood on top of cinder blocks. I wanted that simple look and also didn’t want to spend a lot on this project.
Our neighbors had a whole bunch of cinder blocks, and I asked if I could have four of them. They gave them to me and there we had the desk supplies for free! I painted them with the same white paint I used for the desk, only this time I didn’t add water. I tried spray painting them first, and the spray paint didn’t give the coverage they needed.
Once everything was painted, sealed and dry, we took the wood and added a small piece underneath to attach the pieces together.
The rest of the art station was courtesy of Target and Joanns.
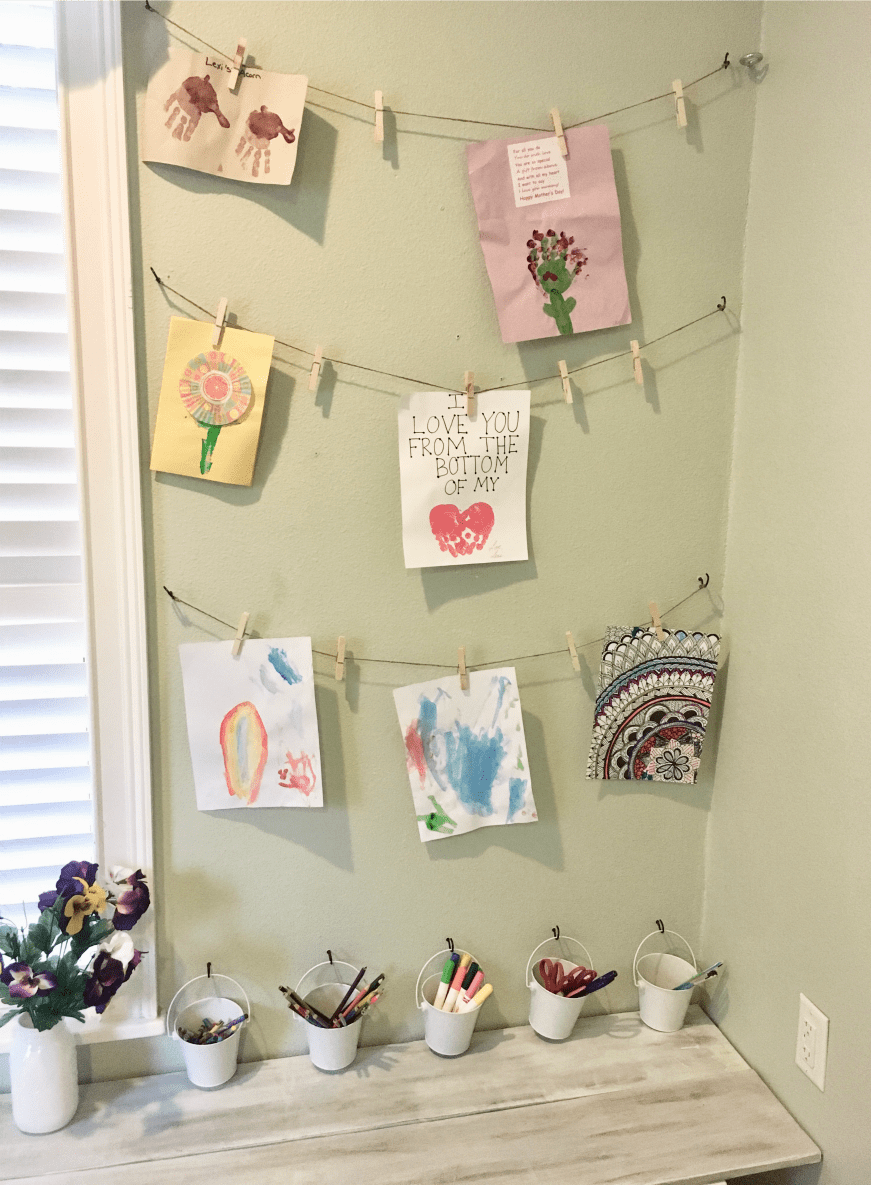
I knew where I wanted to desk to go, and that I would have one smaller wall to work with. I wanted a place where they could display some of their favorite art pieces so I bought some twine, hooks and clothes pins. and gave them a display wall.
I used the same hooks for the little white buckets too (that I found at Target for $1 each!). They were easy to put into the wall, and the buckets hang just above the desk with them. They hold crayons, pencils, markers, kid scissors and paint brushes.
The only thing I am missing is a couple little white chairs or stools. At first I had intended for the kids to sit on the floor, but the desk is just a little too high for that, so they have to kneel. A few little white stools or chairs would accent it perfectly though!
I wanted to make the desk long enough so there would be room for all three kids if they all wanted to draw/color/paint at the same time. We know how kids always want to be doing the thing that the sibling is doing at that very moment. 😉
Are you a flea market, yard sale or thrift store flipper? If so, or if you want to be, check out our free 5-day intro to flipping e-mail course.
Are you specifically a furniture flipper? Do you do it just for yourself or do you do it to make a profit? If you do it to make a profit, check out our online course on how you can increase those furniture flipping profits!
Related Posts:
Lego Travel Storage and Play Table
Gorgeous White Distressed Night Stands
$10 Beautiful Hall Table Refinish








You did an amazing job! Love the way it looks!
thanks so much!
I liked the idea of making the table at home.
thanks! Melissa loves it!